
This is a DIY guide for installation of CISS with Canon Pixma MX457 AIO Printer.
The Canon Pixma MX457 is a Multi-Function Inkjet Printer with Print, Copy, Scan and Fax functions along with Wi-Fi connectivity, Google Cloud Print and Apple AirPrint to enable users to print straight from their smartphones or tablets. The MX457 model comes integrated with ADF (Automatic Document Feeder). Overall, with all these features, this printer looks perfect for a small business/SOHO setup.
However, as with all AIO Inkjet printers, the cost of replacement ink cartridges is the main concern for most users. Cartridges of inkjet printers are expensive and the cost of per print is comparatively higher than laser printers. Refilling cartridges are an option provided it is done properly and quality ink is used.
CISS (Continuous Ink Supply System) is another option for users which allows them to print in bulk at a fraction of the cost.
From Wikipedia…
A continuous ink system (CIS), also known as a continuous ink supply system, a continuous flow system, an automatic ink refill system, a bulk feed ink system, or an off-axis ink delivery system is a method for delivering a large volume of liquid ink to a comparatively small inkjet printhead. Many business and professional grade printers incorporate a continuous ink system in their design to increase printing capacity.
There were literally no guides or videos online for installing CISS on Canon Pixma MX457 model. All steps were done by viewing general guides and using my own best judgement.
- This is DIY installation guide which may be overwhelming for normal users.
- Attempt this DIY only if you are comfortable with the steps and you have a natural knack for DIY stuff
- Do not attempt this if this is your first DIY
- By performing this DIY, you void warranty of the printer, risk damaging the printer and cartridges
There are various CISS kits available in the market, however none is designed specifically for the MX457. So you need to use a general CISS kit and hope that it will be compatible with the Pixma MX457. Researching online led me to CISS kits from Splashjet, who are known to be manufacturers of high quality ink and CISS kits for all major printer brands.
CISS kit ordered from Splashjet Print Technologies.
- Empty CISS kit for Assembly
- Pigment Black Ink for Canon
- Dye Ink for Canon
Total Cost with shipping – Rs. 1864
The CISS Kit
- Splashjet CISS Kit for Canon
- Splashjet CISS Ink for Canon
- Splashjet CISS Ink (CMY) for Canon
- Splashjet CISS Ink (Black) for Canon
- Splashjet CISS Kit for Canon
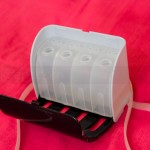
- Splashjet Empty CISS Ink Tank
- Splashjet Empty CISS Ink Tank
- CISS Ink Tube
- Splashjet Empty CISS Ink Tank
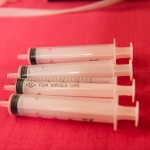
- CISS Kit – Syringe
- CISS Kit – Priming Tool
- CISS Kit – Priming Tool Kit
- CISS Kit – Drill
- CISS Kit – Rubber Plugs for Ink Tank
- CISS Kit – Flow Control Valve
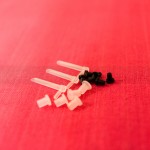
- CISS Kit – Elbows, Sleeves, Plugs
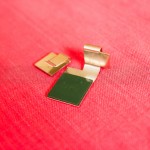
- CISS Kit – Ink Tube Holder Clamp
I first printed several test prints, nozzle check print, head alignment print, so that I can check and compare with the print results after installing the CISS. Installing the CISS is recommended on new cartridges for best results.
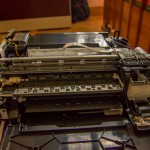
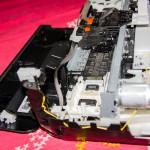
Dismantling the printer was the biggest challenge. Maybe opening the entire printer is not necessary, but I wanted to open the top scanner part completely so that I can have a clear view and access to the printer cartridges to ensure that the tubes and cartridge have a free flow movement. I opened the printer completely as I wanted to route the tube cable inside the printer without causing any hindrance to any moving part.
If you decide to open the printer, be very careful as the plastic parts can be tough to remove and I could not find any service manual online with instructions on how to dismantle the printer. Remove all the visible screws and slowly start removing the plastic panels one by one starting from the corner panels. You would also disconnect the flex cables connecting the top part from the circuit board on the left.
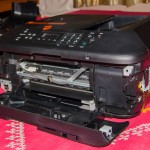
- Canon Pixma MX457 Side Panels Removed
- Canon Pixma MX457 Side Panels Removed
- Canon Pixma MX457 Open with Ink Tube
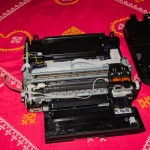
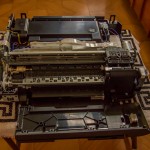
- Canon Pixma MX457 Top Cover Completely Opened
- Canon Pixma MX457 Cartridge Compartment
- Canon Pixma MX457 Top Cover Completely Opened
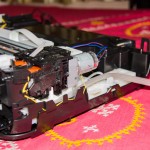
After opening the printer, I attached the ink tubes with tape on the printer cartridges and did several mock movements along the guide rails rocking the cartridges from side to side. This is to ensure I get the best possible position and placement of the ink tubes before actually drilling and fixing the tubes on the cartridges. I also decided to route the cable through the cartridge compartment, run it inside the printer, drill a hole on the right side plastic panel and take the tube cable out through the hole. The advantage of this is, the cable will not be visible from the front and will not obstruct while closing/opening the front trays. The disadvantage is, incase you require to remove the CISS kit, you will have to open the printer again and the CISS ink tank will be like a permanent appendage attached to the printer.
Please note: If you want to route the cable from the front side through the trays, opening the printer is not required, but do check if the ink cable can freely move inside.
- Canon Pixma MX457 Open with Ink Tube
- Canon Pixma MX457 Open with Ink Tube
- Canon Pixma MX457 – Ink Tube Routing
- Canon Pixma MX457 – Ink Tube Routing
- Canon Pixma MX457 – Ink Tube Routing
- Canon Pixma MX457 – Ink Tube Routing
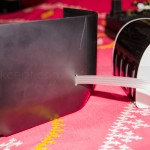
- Canon Pixma MX457 – Ink Tube Hole on Side Panel
- Canon Pixma MX457 – Ink Tube Hole on Side Panel
Once you are sure how to route the ink cable, you can start with the drilling process. Remove the labels from the cartridges so that you can see the holes where you need to drill. The black cartridge hole will be in the center, while the color cartridge will have 3 holes for Magenta (top), Cyan (left) and Yellow (right) color.
An issue with the color cartridge CL-741 after fitting the rubber sleeves and elbows, the top tube (Magenta) might interfere with the locking mechanism and will give error 1401 as the cartridge will not be aligned perfectly. To overcome this, I ensured that the rubber sleeve is pushed inside the hole as much as possible, and trimmed/cut the top of the plastic elbow slightly so that the color cartridge can fit inside the compartment locked. Once I did this, I did not receive the error.
- Printer Cartridge (Color) with CISS Tubes Installed
- Printer Cartridge (Black) with CISS Tubes Installed
- Magenta Tube sleeve pushed inside and top trimmed
After connecting all the tubes, I filled the tank with ink and primed the cartridges using the supplied prime tools. You would need to be careful during this process not to damage the print heads. There might be ink spillage during this process, so ensure you have tissue paper handy and do this on a surface where you can wipe of the ink easily, or there will be ink stains everywhere. Once everything was done to my satisfaction, I assembled the printer and fired it up. No errors were received and I printed all the test prints again. Overall the prints look good and there is not much difference between the original prints and after installing CISS. I will upload scanned copies of the before and after prints for reference.
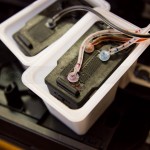
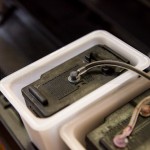
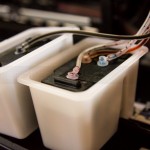
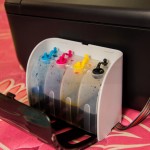
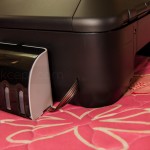
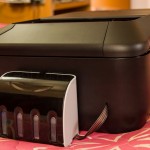
- Canon Pixma MX457 with CISS Ink Tank Filled
- Canon Pixma MX457 with CISS Ink Tank Filled
- Canon Pixma MX457 with CISS Ink Tank
- Canon Pixma MX457 with CISS Ink Tank
The overall process was daunting and on several occasions I thought I had ruined the brand new cartridges and printer, and I should have taken the refilling route. It was also difficult as I decided to open the printer which made the process much more difficult. But the end result has been satisfactory and I am pretty happy with the setup. I have not taken much print outs now, and only time will tell if it was worth taking the risk.
This is not the perfect guide for installing CISS on a Canon Pixma MX457 printer, as there were no professional guide available on this. There maybe easier method if done by a professional CISS installer. So please use this guide at your own risk or take help from a professional.














i have cann e510, but unfortunately cartrifge is dried. to install a ciss kit doi need to replace the cartidge with new one?
Hi,
Do you still use splashjet dye inks?
How is the performance with photo prints?
How bad is the fading with time?
Did you try pigment Inks?
uff.. I know… lots of questions…
Would be delighted if you can spare couple of minutes to answer.
Best Regards
Hey, there i am a newbee and i just bought this type of ciss for my printer Hp Deskjet 1050. Pls tell me How to fill ink in this ciss. There are 3 hole 1 big and 2 small. Should i have to fill only Bighole ??. Help Needed soon.
did not your pigment black clog the ciss tube? dyes are ok and easy to clean. but pigment clogs the ciss tubes. let me know how is it going for you
Hey Dear!!!! I wish to say that this Stuff is awesome, nice written and include almost all important information about ink quality. Nice Photos sharing. I would like to see
more posts like this. You can also find more information ciss Visit Splashjet in Today!!!
Did you tried resetting it, Also can you elaborate on the print quality of photo & text using the original cartridge & CISS inks. Also compared to HP AiO pinters..
About the scanner, how good is the scanning since earlier models had grainy scanners which also use to leave some of the scanned area during scanning..
Lastly about the LCD, How would you compare it to the bigger 2″ LCD that other brands have, Any limitations due to 2 line monochrome LCD..
Have you calculated the cost yet of the printing running on CISS…
This helped a lot. thanks so much. I just have a question, how do you reset the ink levels? My printer is now showing “BLack Ink Volume Unknown”. Do you have any idea how to overcome this?
Hoping to hear from you. Cheers.
After you get the low ink volume message on the printer, it will stop printing after some time. When you reset the ink level, thats when you get the message “Black Ink Volume Unknown” but the printer will continue to print. Even I am getting the same message, but since the printer is functioning and prints, I have not not bothered to get rid of the message.
These are some instructions from the Internet on how to reset the Ink Level on Canon Pixma MP140/MP150, maybe this will also work on the Canon Pixma MX457. I have not tried these instructions yet, will do so soon.
01. Disconnect the power supply to the printer by removing the power lead from the back
02. Press and hold the Power Button whilst plugging the power lead back in, then whilst continuing to hold the button down press the Reset Button (the one with the red triangle inside the circle) twice
03. Release the Power Button and after around 10 seconds the display will show ‘0’
04. Press the + Button to change the value from ‘0’ to ‘1’
05. Press the Colour Button; you’ll notice that both the A4 Plain Paper and A4 Photo Paper LEDs will now be on
06. Make sure that there is some paper in the paper feeder
07. Press the Power Button twice; the printer will now print some random information which you can discard
08. Now open the printer cover (not the scanner cover) and remove the cartridges. With the printer still open, remove the power lead from the back of the printer once again
09. Close the printer cover
10. Replace the power lead and press the Power Button to turn the printer back on
11. Now replace the cartridges and the ink level monitor will be reset
Where is the external ink waste ?
How is the print quality after using their refill ink, because I have same cartridges CL 741 and PG 740 and wanted to buy their ink.
The ink quality is pretty decent and okay, it should be better than other unknown brands in the market. Though I have not used any other ink, so cannot give a definite answer.